> ## Documentation Index
> Fetch the complete documentation index at: https://docs.shakesco.com/llms.txt
> Use this file to discover all available pages before exploring further.
# Send Invoices
> Create and send professional invoices to customers directly from your dashboard
For the complete documentation index, see [llms.txt](/llms.txt).
## Professional Invoices with Crypto Payment
Shakesco lets you create branded invoices and send them to customers with a crypto payment link included. Customers pay through a secure checkout and you receive a receipt and confirmation automatically.
## Creating an Invoice from the Dashboard
Go to [users.shakesco.com/invoices](https://users.shakesco.com/invoices) to create and manage invoices.
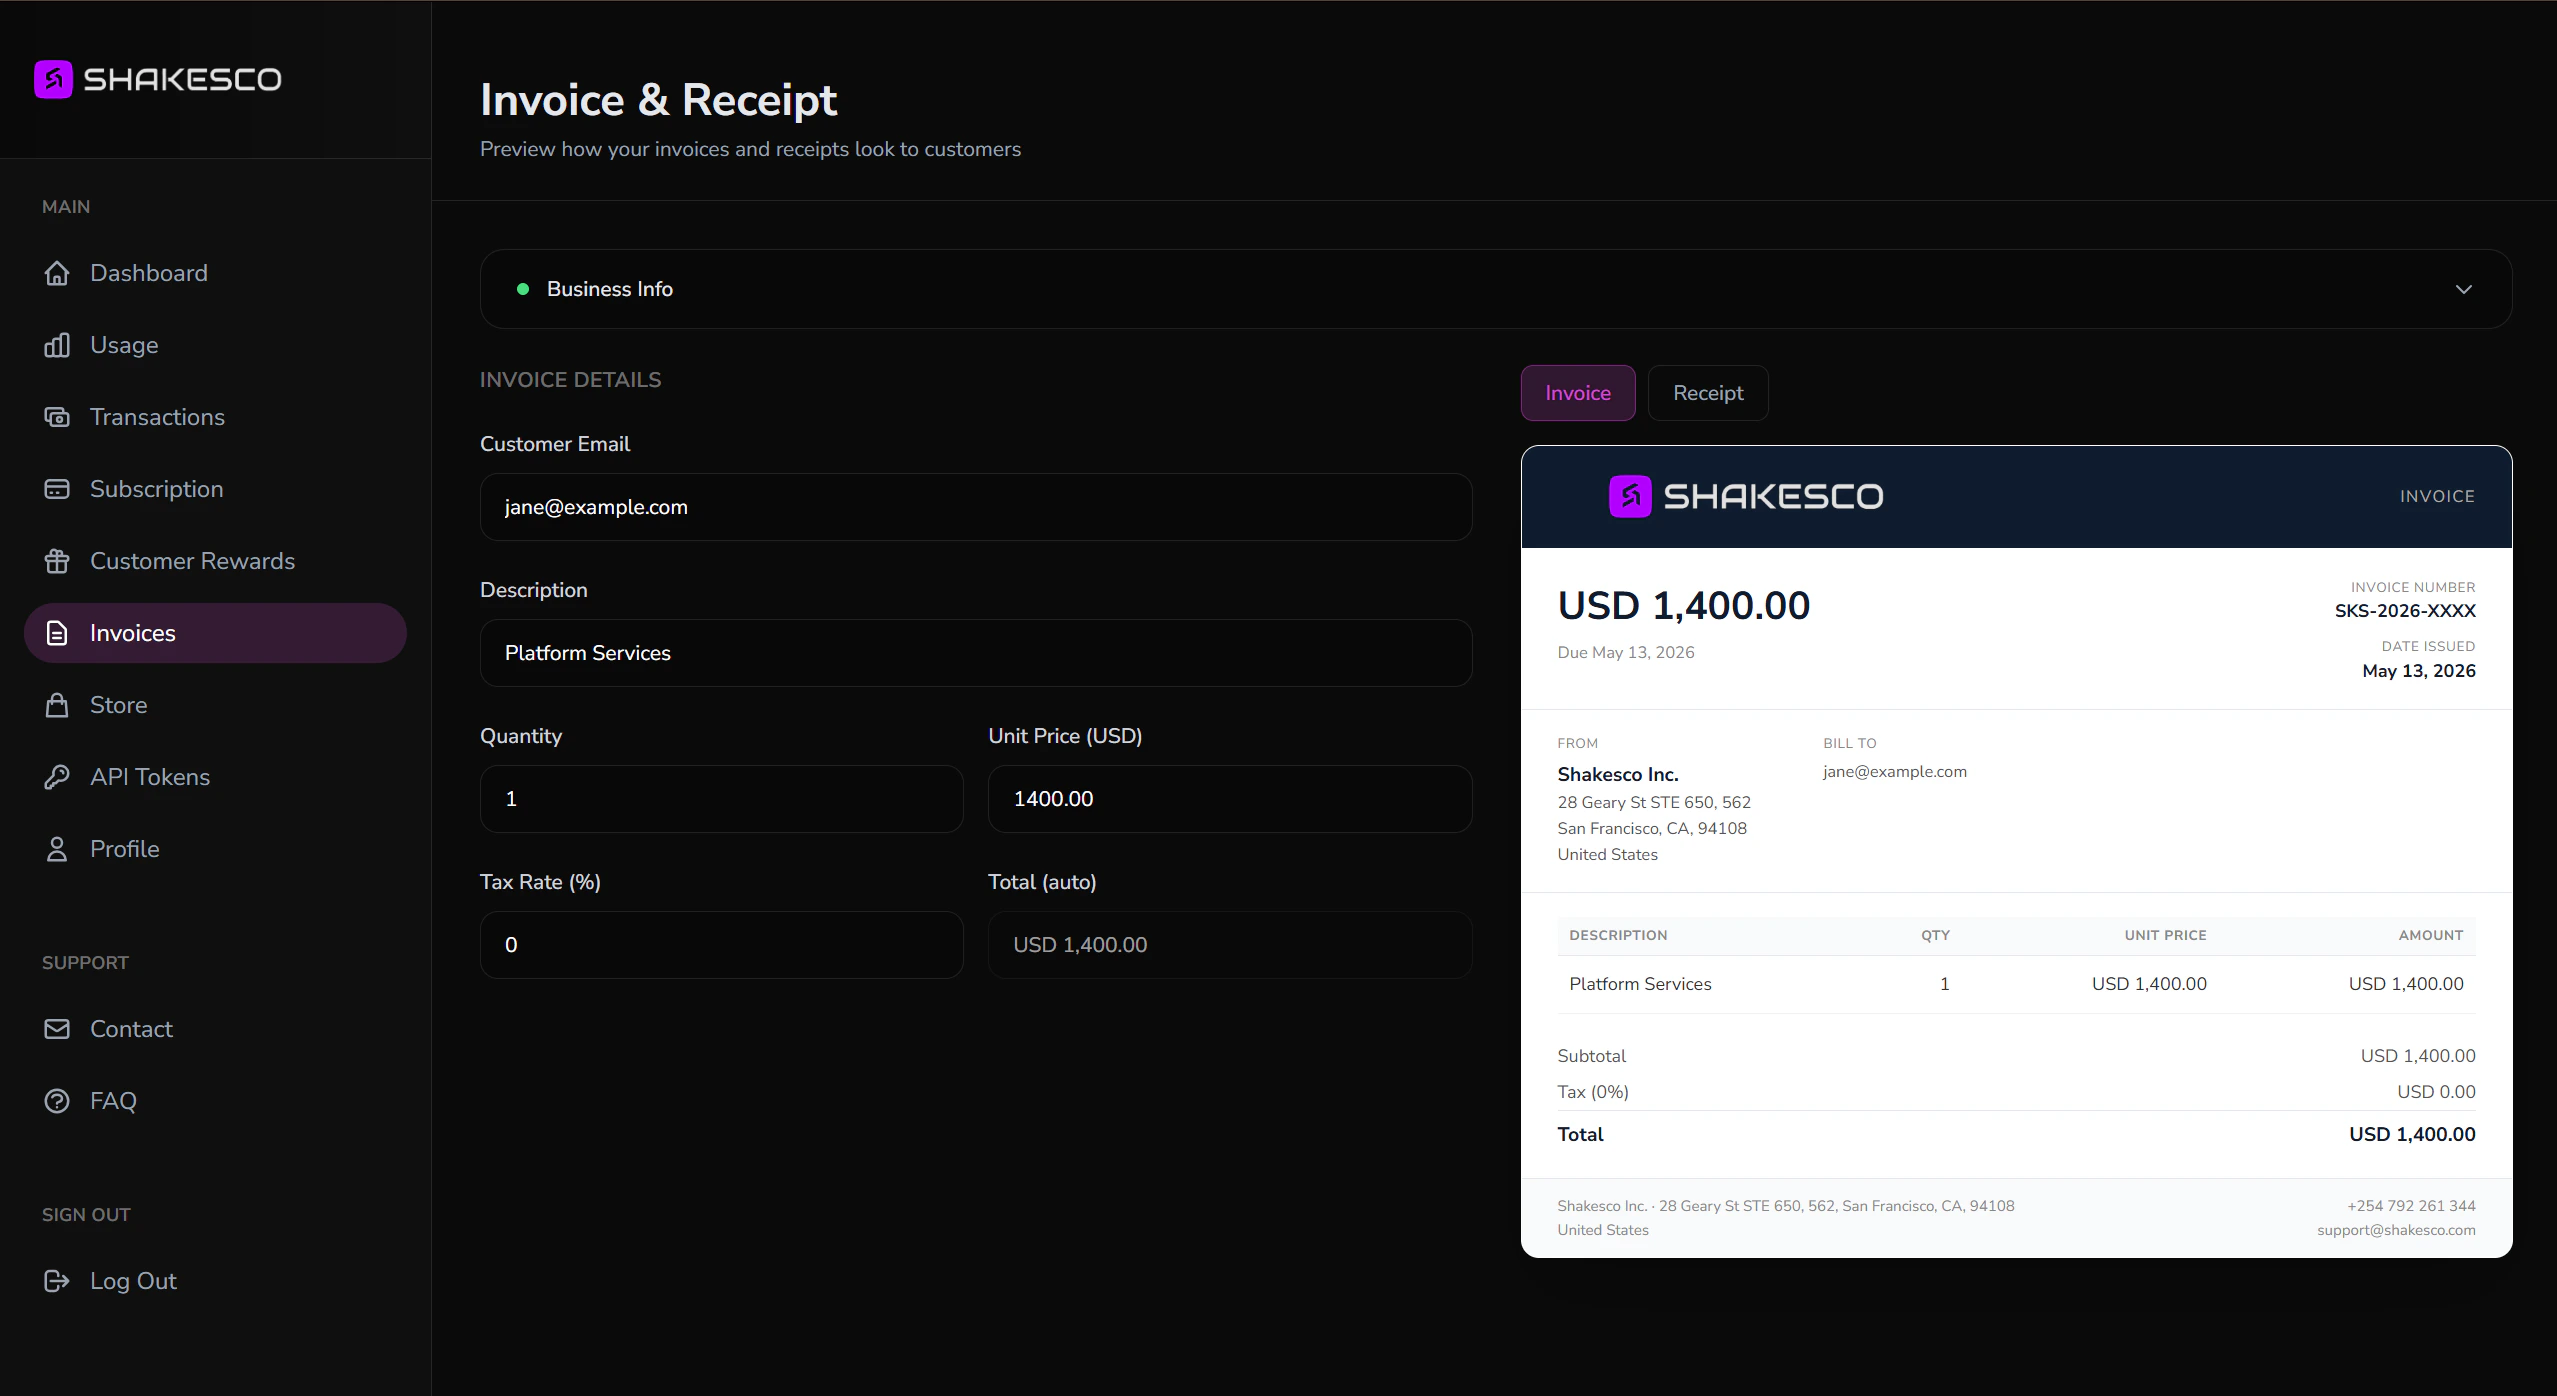 ### Invoice form
Fill in the details on the left. The preview on the right updates live:
* **Customer Email**: where the invoice is sent (optional for walk-in customers)
* **Description**: line item name (e.g. "Platform Services")
* **Quantity**: number of units
* **Unit Price (USD)**: price per unit
* **Tax Rate (%)**: applied to the subtotal
* **Total**: calculated automatically
The invoice gets a unique number (e.g. `INV-2026-a1b2c3d4`), a due date, and your business details automatically.
Switch between **Invoice** and **Receipt** tabs in the preview to see exactly what your customer will receive at each stage.
## What Happens Next
1. Customer receives the invoice by email with a **Pay Now** link.
2. They open the secure checkout at `pay.shakesco.com` and pay with crypto.
3. You both receive a **receipt** with the transaction details.
## Before You Send
**Private invoices need setup first.** To receive a private invoice you must register private payments in the Shakesco app for the specific coin you want to receive. If you send a private invoice (`type: "private"`) without that setup, the invoice is created but payment fails when your customer tries to pay.
A few things to keep in mind when you create invoices:
* **Minimum amount is \$1.** Because of how private transactions settle, request a total of at least \$1. If you need to charge less, [contact us](https://shakesco.com/contact) first.
* **Prefer USDT or SATS.** Both settle fast and cheap, so they are the best assets to receive. For USDT, use a private invoice where possible so no one can see your financial activity.
## Create Invoices via API
For high-volume or automated invoicing, use the Payments API:
```javascript theme={null}
const response = await fetch("https://payments.shakesco.com/invoices", {
method: "POST",
headers: {
Authorization: `Bearer ${API_KEY}`,
"Content-Type": "application/json",
},
body: JSON.stringify({
type: "public",
currency: "USD",
payer_email: "customer@example.com",
items: [{ description: "Platform Services", unit: 1, price: 1400 }],
}),
});
const { invoice_number, payment_url } = await response.json();
// Send payment_url to your customer
```
## Using the Payment URL
Once you have the `payment_url` from the API response, you can present it to customers in two ways.
### Embed as a Button
Add a **Pay with Shakesco** button to your website or app that links directly to the payment URL. The link opens the Shakesco app via deep link if installed, or falls back to the web checkout in the browser:
```html theme={null}
Pay with Shakesco
```
### Display as a QR Code
For in-person or printed payments, render the `payment_url` as a QR code. The customer scans it with any camera app to open the payment page:
```javascript theme={null}
// Using the 'qrcode' npm package
import QRCode from "qrcode";
const canvas = document.getElementById("qr-canvas");
await QRCode.toCanvas(canvas, payment_url);
```
```python theme={null}
# Using the 'qrcode' pip package
import qrcode
img = qrcode.make(payment_url)
img.save("invoice_qr.png")
```
Full documentation: create, void, and query invoices
## Next Steps
List products customers can buy from your link
Analytics, store queries, and more
### Invoice form
Fill in the details on the left. The preview on the right updates live:
* **Customer Email**: where the invoice is sent (optional for walk-in customers)
* **Description**: line item name (e.g. "Platform Services")
* **Quantity**: number of units
* **Unit Price (USD)**: price per unit
* **Tax Rate (%)**: applied to the subtotal
* **Total**: calculated automatically
The invoice gets a unique number (e.g. `INV-2026-a1b2c3d4`), a due date, and your business details automatically.
Switch between **Invoice** and **Receipt** tabs in the preview to see exactly what your customer will receive at each stage.
## What Happens Next
1. Customer receives the invoice by email with a **Pay Now** link.
2. They open the secure checkout at `pay.shakesco.com` and pay with crypto.
3. You both receive a **receipt** with the transaction details.
## Before You Send
**Private invoices need setup first.** To receive a private invoice you must register private payments in the Shakesco app for the specific coin you want to receive. If you send a private invoice (`type: "private"`) without that setup, the invoice is created but payment fails when your customer tries to pay.
A few things to keep in mind when you create invoices:
* **Minimum amount is \$1.** Because of how private transactions settle, request a total of at least \$1. If you need to charge less, [contact us](https://shakesco.com/contact) first.
* **Prefer USDT or SATS.** Both settle fast and cheap, so they are the best assets to receive. For USDT, use a private invoice where possible so no one can see your financial activity.
## Create Invoices via API
For high-volume or automated invoicing, use the Payments API:
```javascript theme={null}
const response = await fetch("https://payments.shakesco.com/invoices", {
method: "POST",
headers: {
Authorization: `Bearer ${API_KEY}`,
"Content-Type": "application/json",
},
body: JSON.stringify({
type: "public",
currency: "USD",
payer_email: "customer@example.com",
items: [{ description: "Platform Services", unit: 1, price: 1400 }],
}),
});
const { invoice_number, payment_url } = await response.json();
// Send payment_url to your customer
```
## Using the Payment URL
Once you have the `payment_url` from the API response, you can present it to customers in two ways.
### Embed as a Button
Add a **Pay with Shakesco** button to your website or app that links directly to the payment URL. The link opens the Shakesco app via deep link if installed, or falls back to the web checkout in the browser:
```html theme={null}
Pay with Shakesco
```
### Display as a QR Code
For in-person or printed payments, render the `payment_url` as a QR code. The customer scans it with any camera app to open the payment page:
```javascript theme={null}
// Using the 'qrcode' npm package
import QRCode from "qrcode";
const canvas = document.getElementById("qr-canvas");
await QRCode.toCanvas(canvas, payment_url);
```
```python theme={null}
# Using the 'qrcode' pip package
import qrcode
img = qrcode.make(payment_url)
img.save("invoice_qr.png")
```
Full documentation: create, void, and query invoices
## Next Steps
List products customers can buy from your link
Analytics, store queries, and more