Checkout
Before getting started, please obtain your API keys from the dashboard and deploy your Business Auto account through the Shakesco app.
Refer to the Integration guide for instructions on parsing values. Additionally, visit the Start section to ensure your auto-payment account is configured to process payments.
If you want to test out the system, just go here.
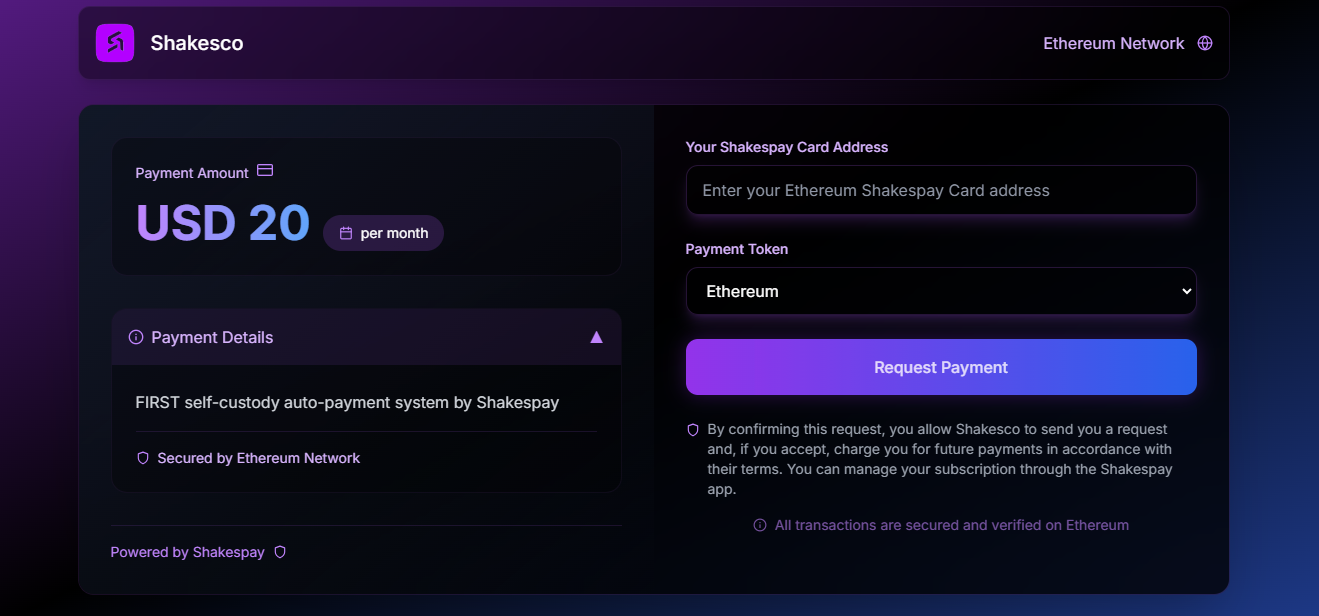
Easily accept auto-payments on Ethereum
Shakesco Checkout simplifies the process of receiving recurring payments. You can either embed it directly into your website or redirect users to complete their checkout. With support for over 300 currencies, you can receive payments from anywhere in the world. We now accept both one-time payments and recurring payments.
Test
Before getting started, send a test request to make sure everything is okay. Go to the API section and receive a test delegate address.
You can now send a start session request.
Test Start session
To get the URL, send a request to this url https://autopay.shakesco.com/start_session. Here is an Example:
const config = {
  method: "POST",
  url: "https://autopay.shakesco.com/start_session",
  headers: {
    accept: "application/json",
    Authorization: `Bearer ${process.env.YOUR_API_KEY}`,
  },
  data: {
    "auto_address": "0x309E7d835ccE6E74BC72A2E523fa7f79FFC0d413",
    "delegate_address": TEST_DELEGATE_ADDRESS,
    "description": "Test description",
    "network": "11155111",
    "period": PERIOD,
    "currency_code": CURRENCY_CODE,
    "amount": 0,
    "token_address": [],
    "should_split": false,
    "redirect_url": REDIRECT_URL,
    "number": "0"
  },
};

axios
  .request(config)
  .then((response) => {
    console.log(response.data);
  })
  .catch((error) => {
    console.log(error);
  });
Info
TEST_DELEGATE_ADDRESS
Enter the test delegate address you received from the API section
CURRENCY_CODE
Currency code that you want to request payment with. Check currency codes here
REDIRECT_URL
Enter URL that the checkout should redirect to if the request is successful.
PERIOD
Period to request payment. Make sure it is in seconds.
Response
{
    "id": 1,
    "url": "https://checkout.shakesco.com?ZXlKaGJHY2lPaUpJVXpJMU5pSXNJblI1Y0NJNklrcFhWQ0o5LmV5SmhkWFJ2WDJGa1pISmxjM01pT2lJd2VESTBOalkxTURFek1ERmlPRFpsWlRjNVpFUTFSak0wTjJReU5qWTVNakV3T0RJMk1EZ3dNallpTENKdVpYUjNiM0pySWpvaU1UTTNJaXdpY0dWeWFXOWtJam9pTmpBME9EQXdJaXdpWTNWeWNtVnVZM2xmWTI5a1pTSTZJbFZUUkNJc0luSmxaR2x5WldOMFgzVnliQ0k2SW1oMGRIQnpPaTh2YzJoaGEyVnpZMjh1WTI5dElpVkVNaUxDSlhSVlJJSWwwc0luTm9iM1ZzWkY5emNHeHBkQ0k2Wm1Gc2MyVXNJa0ZRU1Y5TFJWa2lPaUpsZFdSTmJuQjVhVVpMTUV3NVdIQlFNMFUyZEd0alRHVktSa015YzNJNFJuUTBaVFZrYTFwV01UQTRNbUkzTVdVaUxDSnBZWFFpT2pFM01qQXpOemd4TURNc0ltVjRjQ0k2TVRjeU1ETTNPRFF3TTMwLkpWbGUzd0QxNld0NTkwWW1WSUpsUE5rWEZlb3FyTDZrRHc0RnZmMVEyYlk="
}Get started
To get started, first you need to send an API call to create a session for a specific user. This will return a URL that you can embed or redirect users to for them to complete the request. So when a user is ready to send a request, send the following API call:
URL Request
Before requesting, check if the payer is a business or user. Businesses and customers have different charges per every successful transaction. To check which payer you are requesting, check here
To get the URL, send a request to this url https://autopay.shakesco.com/start_session. Here is an Example:
const config = {
  method: "POST",
  url: "https://autopay.shakesco.com/start_session",
  headers: {
    accept: "application/json",
    Authorization: `Bearer ${process.env.YOUR_API_KEY}`,
  },
  data: {
    auto_address: your_auto_address,
    delegate_address: "", // leave empty
    network: Network,
    period: Period,
    description: user_delegate_address,
    redirect_url: url,
    number: Splitters,
    currency_code: code,
    amount: Amount,
    token_address: Token,
    should_split: Split,
  },
};

axios
  .request(config)
  .then((response) => {
    console.log(response.data);
  })
  .catch((error) => {
    console.log(error);
  });
Info
auto_address
Your Business auto account address. Can be found in dashboard. Depending on Network.
network
Depending on where your Business auto account address is deployed. Enter 1 for Ethereum or 137 for Polygon
period
Period to request payment. Make sure it is in seconds.
description
Enter your business description. Here you can enter what the subscription is about.
redirect_url
Enter URL that the checkout should redirect to if the request is successful.
number
Enter the number of splitter you will allow. If you want a total of 3 Splitters, enter 2. This is only allow a user to have 2 splitters plus themselves.
currency_code
Currency code that you want to request payment with. Check currency code s here
amount
Amount to request. Parse amount depending on the currency code.
token_address
Here enter an array of all the tokens and/or coins you want to accept.
Eg: [“Polygon”, “WETH”, “DAI”]
Here are the tokens and coins your auto account supports:
Polygon
- Polygon
- WBTC
- WETH
- USDT
- USDC
- DAI
Ethereum
- Ethereum
- USDT
- USDC
- DAI
Tokens and coins are displayed the way you parse them in the array.
should_split
If you want to allow split payment. Enter true or false.
Response
{
    "id": 1,
    "url": "https://checkout.shakesco.com?ZXlKaGJHY2lPaUpJVXpJMU5pSXNJblI1Y0NJNklrcFhWQ0o5LmV5SmhkWFJ2WDJGa1pISmxjM01pT2lJd2VESTBOalkxTURFek1ERmlPRFpsWlRjNVpFUTFSak0wTjJReU5qWTVNakV3T0RJMk1EZ3dNallpTENKdVpYUjNiM0pySWpvaU1UTTNJaXdpY0dWeWFXOWtJam9pTmpBME9EQXdJaXdpWTNWeWNtVnVZM2xmWTI5a1pTSTZJbFZUUkNJc0luSmxaR2x5WldOMFgzVnliQ0k2SW1oMGRIQnpPaTh2YzJoaGEyVnpZMjh1WTI5dElpVkVNaUxDSlhSVlJJSWwwc0luTm9iM1ZzWkY5emNHeHBkQ0k2Wm1Gc2MyVXNJa0ZRU1Y5TFJWa2lPaUpsZFdSTmJuQjVhVVpMTUV3NVdIQlFNMFUyZEd0alRHVktSa015YzNJNFJuUTBaVFZrYTFwV01UQTRNbUkzTVdVaUxDSnBZWFFpT2pFM01qQXpOemd4TURNc0ltVjRjQ0k2TVRjeU1ETTNPRFF3TTMwLkpWbGUzd0QxNld0NTkwWW1WSUpsUE5rWEZlb3FyTDZrRHc0RnZmMVEyYlk="
}
Sessions
After sending the request and receiving your url, the user has 5 minutes before the URL expires. You will need to send the same request or a different request to get a new URL that the user can use.
Check payment
As seen here, the user will be redirected to your website or application if the request was successful. This URL should be a page where you can check if the user has made payment / accepted your request. To check this, you can easily send an API call.